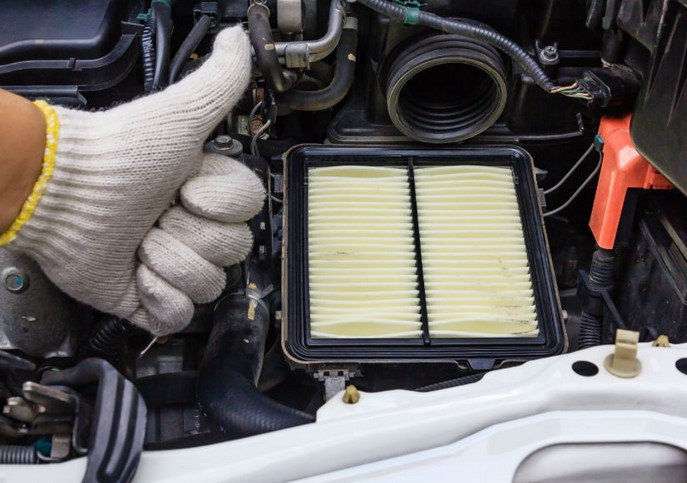
Just last week, a customer brought their sedan into my shop complaining about a sudden drop in fuel economy and a sluggish response when hitting the gas pedal. They were worried it was a failing sensor or a costly fuel injector issue. I popped the hood, unclipped a plastic box, and pulled out an engine air filter so choked with dust, leaves, and bugs that it looked like it had been buried underground. Ten minutes and a twenty-dollar part later, the car ran beautifully again.
Over my ten years as an automotive technician, I’ve seen thousands of drivers pay hefty dealership premiums for a job that requires absolutely zero mechanical background. Learning how to change an air filter yourself is the ultimate gateway into DIY car maintenance. It saves you money, protects your engine, and takes less time than making a cup of coffee.
Let’s dive into why this tiny part matters so much and how you can swap it out today.
Why Your Engine Needs to Breathe Freely
To understand why you need to change air filter elements regularly, you have to understand how your engine functions. An internal combustion engine is essentially a giant air pump. For every gallon of fuel your car burns, it consumes roughly 10,000 gallons of air.
If that air isn’t clean, airborne debris like dirt, sand, and pollen will enter the combustion chamber. Over time, these microscopic particles act like sandpaper, scoring your cylinder walls and wearing down your piston rings.
Analogy: Imagine trying to run a marathon while breathing through a thick, muddy wet blanket. That is exactly what your engine goes through when it tries to draw power through a severely clogged filter.
When you replace a dirty filter with a fresh one, you instantly restore the optimal air-fuel ratio, allowing your engine to breathe easily, burn fuel efficiently, and deliver maximum throttle response.
When is the Right Time to Change Your Air Filter?
As a general rule of thumb, most automotive manufacturers recommend that you change air filter units every 12,000 to 15,000 miles. However, in my experience, intervals depend heavily on your driving environment.
If your daily commute involves unpaved gravel roads, heavy construction zones, or severe desert dust, your filter might need a replacement in half that time. Here are the classic warning signs that your filter is suffocating:
-
A noticeable drop in gas mileage: Your engine is forcing itself to work harder to pull in air.
-
The “Check Engine” light illuminates: Modern mass airflow (MAF) sensors will detect restricted airflow and trigger a dashboard warning.
-
Misfiring or rough idling: A lack of oxygen creates a “rich” fuel mixture, causing spark plugs to foul.
-
Visual grime: If you look at the filter folds and see dark grey soot instead of clean white or yellow paper, it’s time.
Step-by-Step Guide: How to Change Air Filter Elements Like a Pro
You don’t need an expensive toolbox for this. In 90% of modern vehicles, this is a completely tool-less job, though a few models might require a basic screwdriver or socket wrench.
Step 1: Locate the Air Cleaner Assembly Box
Park your car on a level surface, turn off the engine, and engage the parking brake. Pop the hood and look for a large, black, plastic housing box. It is usually located on the side of the engine bay, connected to a thick plastic intake duct that feeds directly into the throttle body.
Step 2: Open the Filter Housing
Depending on your vehicle’s make and model, the air box lid will be secured by one of three methods:
-
Metal clips/clamps: These can be easily flipped open with your fingers.
-
Wing nuts: Simply unscrew them by hand counter-clockwise.
-
Screws/Hex bolts: Use a flathead screwdriver or an 8mm socket to loosen them. (You don’t need to completely remove the screws from the lid; just loosen them until the top lifts off).
Step 3: Remove the Old Filter and Inspect the Housing
Carefully lift the housing cover and pull out the old panel filter. Take note of which direction the rubber seal faces and how the pleats are oriented.
Before you throw the new one in, look inside the bottom of the air box. You will often find a collection of trapped leaves, sand, or even rodent nesting material.
Step 4: Drop in the New Filter
Place the fresh, clean filter into the housing. Ensure that the rubber gasket fits snugly along the entire rim of the air box. If it’s sitting crooked, the lid won’t seal properly, allowing unfiltered “dirty” air to bypass the system completely.
Step 5: Secure the Lid
Pop the plastic cover back on, snap the clips shut, or tighten the screws down. Give the box a gentle wiggle to ensure it is locked tight. Fire up the engine, and you are done!
Expert Advice: Avoid These Common Mistakes
💡 Pro Tip: The Sunlight Test
If you pull your filter out and it looks slightly grey, but you aren’t sure if it actually needs replacing, hold it up to a bright flashlight or the sun. If light cannot penetrate through the paper pleats, the filter is fully loaded with microscopic dust and must be replaced.
⚠️ Never Blow It Out with Compressed Air!
A common old-school trick is using an air compressor gun to blow dust out of an old filter to reuse it. Do not do this. High-pressure air tears the microscopic cellulose fibers inside the paper media. While the filter might look cleaner afterward, you have actually created microscopic holes that will let engine-destroying dirt pass straight through.
Summary: A Simple Maintenance Task with Big Rewards
Taking ten minutes to change air filter elements yourself is one of the easiest ways to keep your vehicle running efficiently while bypassing steep dealership labor rates. It keeps your fuel economy high, preserves your acceleration, and extends the overall life of your engine.
Now it’s your turn. Have you ever checked your own air filter, or did you discover something unexpected hiding inside your air box? Let me know in the comments below, and feel free to drop your car’s year, make, and model if you need help finding the right part number!