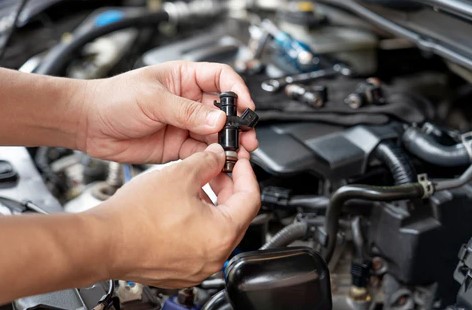
Your car is idling at a red light, and suddenly you feel it—a strange, rhythmic shudder through the steering wheel. When the light turns green, you step on the gas, but the acceleration stumbles before finally picking up speed. In my 10+ years working in automotive bays, I cannot tell you how many drivers come to me fearing their transmission is slipping or their engine is on its deathbed when this happens. More often than not, the culprit is a microscopic layer of carbon buildup choking a tiny nozzle no wider than a human hair.
Modern engines are marvels of precision, but they are incredibly sensitive to dirt. Think of your fuel injectors like a high-end perfume atomizer or a misting nozzle on a backyard patio. If tiny mineral deposits block those minuscule holes, you don’t get a fine, beautiful mist; you get an uneven, spluttering squirt.
Learning how to clean a car’s fuel injectors is one of those mid-tier DIY skills that separates the casual car owner from the true enthusiast. It saves you hundreds of dollars in shop labor, cures rough idles, and restores that crisp, factory-fresh engine response. Let’s look at how to get it done safely right in your driveway.
The Anatomy of a Clogged Fuel Injector
To understand why cleaning them matters, we have to look at what they actually do. Your fuel injectors are electronically controlled valves that open and close thousands of times a minute. They spray highly pressurized gasoline directly into the intake manifold or combustion chamber.
When you shut off your hot engine, a tiny amount of residual fuel remains on the tip of the injector nozzle. The intense ambient heat causes the volatile elements of the fuel to evaporate, leaving behind heavy chemical compounds. Over time, this creates a hard, crusty layer known as carbon fouling or fuel gumming.
When this happens, the engine’s air-fuel ratio gets thrown completely out of balance. Your vehicle’s computer (ECU) tries to compensate, but a disrupted spray pattern leads to incomplete combustion, misfires, and a noticeable drop in your fuel economy.
Choosing Your Method: In-Tank vs. Direct Purge Kit
Before spinning any wrenches, you need to decide which level of cleaning your car actually requires. In the professional world, we categorize DIY injector cleaning into two primary methods.
Method A: The In-Tank Chemical Additive (Beginner-Friendly)
This involves pouring a concentrated detergent directly into your gas tank. As you drive, the treated fuel flows through the system, gradually dissolving varnishes and light carbon deposits.
Method B: The Direct Pressurized Purge Kit (Intermediate)
This is the closest you can get to a professional shop service without removing the injectors from the engine. You disable the vehicle’s fuel pump, connect a pressurized canister of specialized cleaning solvent directly to the engine’s fuel rail, and run the engine solely on the cleaning chemical for 15 minutes.
Tools and Materials Gathered
If you want to perform a deep-cleaning direct purge (Method B), you will need to gather a few specialized tools before starting.
-
A dedicated pressurized fuel injector cleaner kit (with a pressure gauge)
-
A canister of professional-grade fuel injector cleaning solvent
-
Universal fuel rail adapters (usually included in the kit)
-
Safety glasses and chemical-resistant gloves
-
Basic hand tools (to disconnect fuel lines or fuses)
-
A clean microfiber cloth to catch stray fuel drips
Step-by-Step Guide: How to Clean a Car’s Fuel Injectors (Direct Method)
Because this method introduces highly flammable solvent directly into the engine bay, safety is paramount. Work in a well-ventilated space, keep a fire extinguisher nearby, and always wear your protective gear.
Step 1: Warm Up the Engine
Start your car and let it run until it reaches its normal operating temperature. Warm metal expands slightly, and a warm engine block helps the chemical solvent soften and break down stubborn carbon deposits much faster than a freezing cold engine. Shut the engine off once it’s warm.
Step 2: Locate and Disable the Fuel Pump
You do not want your car’s actual fuel pump screaming at 50 PSI, spraying gasoline all over the engine bay while you are doing this. Open your vehicle’s fuse box (under the hood or dashboard) and locate the fuel pump fuse or relay using the diagram on the box lid. Pull the fuse out, start the car, and let it run until it sputters and dies. This safely relieves the residual pressure inside the fuel lines.
Step 3: Connect to the Fuel Rail Test Port
Locate the fuel rail—the metal pipe that supplies fuel to all of your injectors. Most modern cars have a service port on this rail that looks exactly like a bicycle tire valve, known as a Schrader valve. Screw the adapter hose from your pressurized cleaning kit directly onto this test port.
Pro Tip from the Garage: If your vehicle lacks a Schrader valve, you will have to physically disconnect the main fuel supply line from the rail and use a T-fitting adapter. If you do this, make sure to cap or loop the return line so gasoline doesn’t shoot out from the tank side when you cycle the ignition!
Step 4: Hook Up the Cleaning Solvent Canister
Hang the canister of injector cleaning solvent from your open hood. Thread the canister tightly onto the cleaning kit hose assembly. Make sure the regulator valve on the kit is completely closed before doing this.
Step 5: Adjust the Kit’s Pressure Regulator
Your cleaning kit relies on compressed air or the internal pressure of the aerosol can to push the fluid through the injectors. Look up your vehicle’s factory fuel system pressure spec. Using the regulator knob on your cleaning kit, adjust the pressure to match or sit slightly below the factory setting (typically between 30 to 45 PSI).
Step 6: Run the Engine on the Solvent
Open the valve on your cleaning kit to let the fluid fill the fuel rail. Turn your car’s ignition key and start the engine. It will idle solely on the pressurized cleaning solvent.
Let the car idle until the canister runs completely dry and the engine stalls out on its own. This process typically takes anywhere from 10 to 20 minutes depending on the size of the canister.
Step 7: Disconnect and Reassemble Everything
Turn off your car’s ignition. Close the cleaning kit valves, slowly relieve any trapped pressure in the tool’s line, and disconnect the adapter from the Schrader valve. Reinstall your fuel pump fuse or relay, tighten your gas cap, and turn the key to the “ON” position for 5 seconds without cranking to let the factory system prime itself with fresh gasoline.
Diagnostic Check: When Cleaning Isn’t Enough
While a deep chemical purge works wonders on 90% of sluggish vehicles, it cannot fix mechanical hardware failures.
| Symptoms | Likely Cause | Solution |
| Rough idle cures instantly after cleaning | Standard carbon fouling / fuel gumming | Successful service; no further action needed. |
| Persistent misfire on one specific cylinder | Failed internal solenoid or shorted wiring | Replace that specific fuel injector. |
| Strong gasoline smell under the hood | Degraded rubber O-rings at the injector base | Replace the rubber O-rings immediately. |
If your car utilizes a modern Gasoline Direct Injection (GDI) system, the tips of the injectors are located right inside the fiery inferno of the combustion chamber. They foul up much worse than older port-injection styles. While a fuel rail purge helps, GDI engines often require manual cleaning of the intake valves via walnut-blasting if the performance issues don’t vanish after an injector flush.
Keeping Your Fuel System Spotless
The easiest way to avoid doing this tedious chore frequently is prevention. Always try to fill up your tank at stations certified as Top Tier gas. These brands contain significantly higher concentrations of detergent additives that actively clean your intake valves and injector tips every single mile you drive.
How is your car idling lately? Have you noticed your gas mileage dipping below its usual average? If you’re planning to tackle this cleaning project yourself or have questions about finding your fuel rail port, leave a comment below—I’m always happy to jump in and help you troubleshoot!