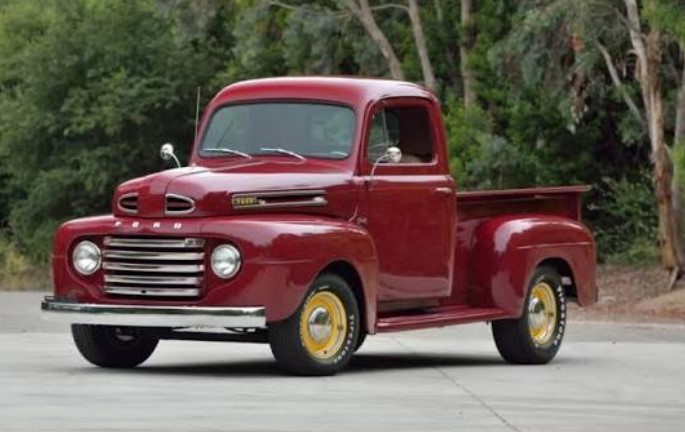
Best Old-School Pickup Trucks: Classic and Reliable Models

Source:https://encrypted-tbn0.gstatic.com

Picture this: You are sitting behind a massive, thin-rimmed steering wheel, the gentle rumble of a carbureted V8 vibrating right through your seat, and a dead-simple dashboard with actual mechanical gauges staring back at you. There are no touchscreen menus to navigate just to turn on the air conditioning. No annoying sensor chimes. Just pure, mechanical honesty.

In my ten-plus years working as an automotive mechanic and writer, I’ve noticed a fascinating shift. People are getting tired of rolling computers masquerading as vehicles. They want something they can actually fix themselves with a basic socket set on a Saturday morning.


Hunting for the best old-school pickup trucks isn’t just about chasing a retro aesthetic; it’s about finding a rock-solid, dependable workhorse built during an era when longevity trumped planned obsolescence. Let’s break down the most legendary classic rigs that still make perfect sense for beginners and intermediate enthusiasts today.

What Makes an Old-School Truck Truly Reliable?

Before we name the models, let’s talk mechanics. Modern trucks rely on highly complex electrical networks, direct-injection systems, and variable valve timing. If one sensor fails, the whole truck goes into “limp mode.”

Classic trucks are the complete opposite. Think of a classic truck engine like a basic mechanical wrist watch—it relies on simple, heavy-duty parts working in perfect harmony. If it has spark, fuel, and compression, it will run.

They feature rugged body-on-frame construction, durable solid axles, and massive engine bays with plenty of room to move your hands around. This simplicity makes them the ultimate learning platform for anyone looking to get into DIY automotive maintenance.

The Definitive Kings of the Classic Truck World

While there were dozens of utilitarian options built between the 1960s and 1990s, three specific truck families stand out for their parts availability, ease of repair, and sheer durability.

1. The 1973–1987 Chevrolet/GMC “Square Body” (C/K Series)

If you ask someone to draw a vintage truck from memory, they will likely draw a Chevy Square Body. This generation ran for nearly 15 years with minimal changes, making it one of the most successful production runs in automotive history.


  • The Engine to Look For: The ubiquitous 350 cubic-inch (5.7L) Small Block V8.

  • Why It’s a Legend: Chevrolet built millions of these engines. You can walk into practically any auto parts store in North America and find an alternator, water pump, or distributor on the shelf for cheap.

  • Pro Tip from the Shop: Watch out for the saddle-bag fuel tanks located outside the frame rails on these models, and check the inner rocker panels and cab corners carefully for rust.

2. The 1973–1979 Ford F-150 (“Dentside” Generation)

Ford’s sixth-generation F-Series earned the nickname “Dentside” because of the distinctive inverted groove running along the side of the body. These trucks are absolute tanks.

  • The Engine to Look For: The 300 cubic-inch (4.9L) Inline-6.

  • Why It’s a Legend: This specific engine is widely considered by mechanics to be one of the most bulletproof powerplants ever designed. It uses a gear-driven timing system instead of a chain or belt, eliminating a major mechanical failure point. It behaves like a tractor engine—low RPMs, massive torque, and completely unbothered by abuse.

  • The Technical Nuance: If you want four-wheel drive, look for models featuring the New Process 205 (NP205) transfer case. It uses a heavy-duty, cast-iron, gear-driven design that is virtually indestructible compared to modern chain-driven aluminum transfer cases.

3. The 1979–1995 Toyota Pickup (Hilux / 4×4)

Old-school cool doesn’t belong exclusively to Detroit. If you prefer a compact footprint with legendary trail capability, the vintage Toyota Hilux platforms are unmatched.

  • The Engine to Look For: The legendary 22R or 22RE (Fuel-Injected) 2.4L four-cylinder.

  • Why It’s a Legend: It’s a beautifully simple overhead-cam design that will happily run forever even under severe neglect.

  • The Intermediate Insight: Pre-1985 models are highly coveted because they feature a solid front axle (SFA) instead of an independent front suspension (IFS). For off-roading, a solid front axle provides incredible durability and wheel articulation, though it does ride a bit like an old farm wagon on the highway.

A Quick Buying Guide for Beginners

When shopping around for the best old-school pickup trucks, your biggest enemy isn’t mechanical wear—it’s rust. Engines and transmissions can be rebuilt in a weekend, but repairing deep structural rust requires specialized welding skills and thousands of dollars in bodywork.

What to Check Where to Look What it Means
Cab Corners & Rockers Bottom edges of the cab behind the doors Common area for trapped moisture; costly body repair if rotted.
Frame Rails Near the rear axle leaf spring mounts Surface rust is fine; pitting or structural holes mean you should walk away.
Fluid Colors Dipsticks (Engine & Transmission) Milky oil indicates a blown head gasket. Smelly, burnt transmission fluid means an imminent rebuild.

Many trucks from the late 1970s and early 1980s feature complex, primitive emission control systems full of brittle plastic vacuum lines (often called “vacuum routing nightmares”). Look for models that have been simplified, or ensure your local state laws don’t require strict smog testing for vehicles over 30 years old.

Keeping the Legacy Alive

Choosing an old-school pickup over a modern vehicle means accepting a few compromises. You won’t get a five-star crash rating, your fuel economy will likely hover in the low teens, and you will have to get your hands dirty occasionally.

But in return, you get an unmatched driving experience, a vehicle that holds its financial value incredibly well, and a timeless machine that turns heads everywhere it goes. They just don’t build them like this anymore.

Are you thinking about purchasing your very first classic project truck, or do you have fond memories of an old family workhorse? Drop a comment below with your favorite model, or ask me any technical questions about what to look for on a test drive!
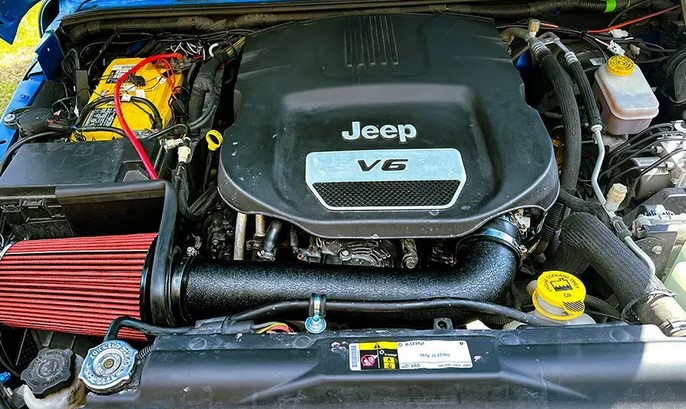
How to Clean a Car’s Air Filter: Step-by-Step Guide

Source:https://flasharkracing.com

Imagine driving down the highway, pushing your gas pedal down, and feeling… nothing. Just a sluggish, hesitant response from an engine that sounds like it’s choking. In my 10+ years under the hood as a mechanic, I’ve had countless frantic car owners come into my shop thinking their transmission was shot or their fuel injectors were ruined. More than half the time, I open the hood, pull out a pitch-black rectangle caked in dust, bugs, and debris, and show it to them.

Your engine is essentially a giant air pump. To generate power, it needs a constant mix of fuel and oxygen. Think of your car’s air filter as the lungs of your vehicle. If you’ve ever tried to go for a sprint while breathing through a thick wool scarf, you know exactly how your engine feels when that filter is clogged.

Learning how to clean a car’s air filter is one of the easiest, most satisfying DIY maintenance tasks you can perform. It saves you a pricey trip to the mechanic, restores your fuel economy, and brings that crisp throttle response right back to life. Let’s dive into exactly how to do it without breaking anything.

First Things First: Can Your Filter Actually Be Cleaned?

Before you grab your tools, we need to address a crucial technical detail. Not all air filters are created equal, and trying to clean the wrong type will ruin it completely.

Disposable Paper Filters vs. Washable Performance Filters

  • OEM Paper Filters: Most factory cars come equipped with standard pleated paper filters. These cannot be washed. Water or cleaning fluid will destroy the paper fibers, rendering them useless. If you have a paper filter, you can gently tap out loose debris, but if it’s deeply discolored, it must be replaced.

  • Reusable/Performance Filters: Brands like K&N, AEM, or dry-flow aftermarket filters are made of cotton gauze, synthetic materials, or foam. These are specifically engineered to be cleaned, re-oiled (in some cases), and reused for hundreds of thousands of miles.

Pro Tip from the Garage: Hold your filter up to a bright overhead light or the sun. If light easily passes through the pleats after a gentle tap, it’s still good. If it looks like a solid block of charcoal and blocks all light, it’s time for a deep clean or a total replacement.

Tools and Materials You’ll Need

You don’t need an advanced toolbox for this. In fact, you probably have most of this sitting in your garage or laundry room right now.

  • A specialized air filter cleaning solution (or a mild liquid dish soap)

  • A soft-bristle brush (an old toothbrush works beautifully)

  • A bucket of warm water

  • Clean, lint-free microfiber towels

  • Filter oil (Only if your aftermarket filter explicitly requires it)

  • Basic hand tools (usually just a flathead screwdriver or a socket wrench to open the air box)

Step-by-Step Guide: How to Clean a Car’s Air Filter

Follow these steps precisely to ensure you don’t accidentally introduce dirt into your engine’s intake tract.

Step 1: Locate the Air Filter Box (Air Housing)

Pop your hood and look for a large, black plastic box sitting near the top or side of the engine. It is usually connected to a thick, ribbed plastic hose that leads directly into the engine intake.

Step 2: Open the Housing and Remove the Filter

Most modern cars use simple metal clips that you can snap open with your fingers. Older or heavy-duty vehicles might secure the housing with a few screws or bolts. Carefully undo them, lift the cover, and slide the filter out.

Crucial Warning: The moment the filter is out, your engine’s intake is exposed. Take a clean microfiber towel and temporarily cover the open intake pipe. The absolute last thing you want is a stray bolt, leaf, or bug dropping down into your engine cylinders while you are busy cleaning.

Step 3: Loose Debris Removal (The Dry Clean)

Before getting the filter wet, hold it upside down and gently tap it against a hard surface like your garbage can. Watch the dust fly! Take your soft brush and gently sweep between the pleats to remove trapped leaves, dead bugs, and loose dirt chunks. Always brush away from the clean side of the filter.

Step 4: Apply the Cleaner and Soak

Spray your air filter cleaner generously onto both sides of the filter. If you don’t have a specialized spray, mix a tablespoon of mild dish soap into a bucket of warm water and submerge the filter.

Let the cleaning solution sit and break down the accumulated grease and grime for about 10 to 15 minutes. Do not scrub aggressively, as you can tear the cotton or synthetic fabric.

Step 5: Rinse it Out Properly

Rinse the filter using low-pressure water from a garden hose or a sink faucet.

The Golden Rule of Rinsing: Always run the water from the clean side of the filter out through the dirty side. This flushes the dirt backwards out of the fabric instead of driving it deeper into the filtration layers. Avoid high-pressure nozzles, as they will punch holes right through the filter media.

Step 6: The Long Shake and Air Dry

Shake off the excess water. Now comes the part that requires patience: let it air dry completely.

Do not use a heat gun, hair dryer, or compressed air to speed up this process. Intense heat can shrink the filter fibers, and compressed air will blast microscopic holes through the fabric, allowing engine-damaging dust to pass through later. Place it in a clean, sunny spot and wait. This usually takes a few hours.

Step 7: Re-Oiling (If Applicable)

If you are using an oiled cotton filter (like a classic red K&N filter), you must apply a fresh layer of filter oil once it is 100% dry. Spray a light, even coat along the top of each pleat.

Do not over-oil your filter! I cannot stress this enough. If you drench the filter in oil, the excess oil will get sucked into your intake system and coat your Mass Airflow (MAF) Sensor. A contaminated MAF sensor will throw a Check Engine Light, cause rough idling, and ruin your fuel economy. Keep the coating light and uniform. If you have a “dry” synthetic performance filter, skip this step entirely.

Step 8: Reinstall and Button Up

Remove the temporary towel you placed over the engine intake. Drop your clean, dry filter back into the housing. Ensure it sits perfectly flush within the rubber seals of the air box—if it’s misaligned, unfiltered air will bypass it entirely. Snap the clips back into place or tighten down the bolts, and you are officially done!

How Often Should You Clean Your Air Filter?

As a rule of thumb, you should check your air filter every 10,000 to 15,000 miles. However, your environment dictates your maintenance schedule.

Driving Environment Recommended Inspection Frequency
City/Highway (Normal) Inspect every 12 months / 12,000 miles
Dusty/Rural/Construction Zones Inspect every 3 to 6 months
Arid/Desert Regions Inspect every 3,000 miles (with every oil change)

If you frequently drive on dirt roads or live in a highly polluted metropolitan area, your filter will choke up twice as fast. Regular checks keep your horsepower up and your fuel costs down.

The Verdict: A Simple Job with Massive Benefits

Cleaning your reusable car air filter is a straightforward weekend project that yields immediate results. You’ll feel the difference the moment you step on the gas pedal: smoother acceleration, a happier engine note, and a few extra miles out of your fuel tank. Plus, keeping that dirt out extends the overall lifespan of your engine internals significantly.

How does your car’s air filter look right now? Have you ever encountered a completely blocked intake while working on your vehicle? Drop your stories, questions, or any DIY struggles you’ve had in the comments section below—I’ll be hanging out to answer them and talk shop!